ShopDreamUp AI ArtDreamUp
Deviation Actions


Description
FULL VIEW/DOWNLOAD PLZ!
English: this is a little tutorial of how to draw curls for beginners (or not XD, enjoy anyway).
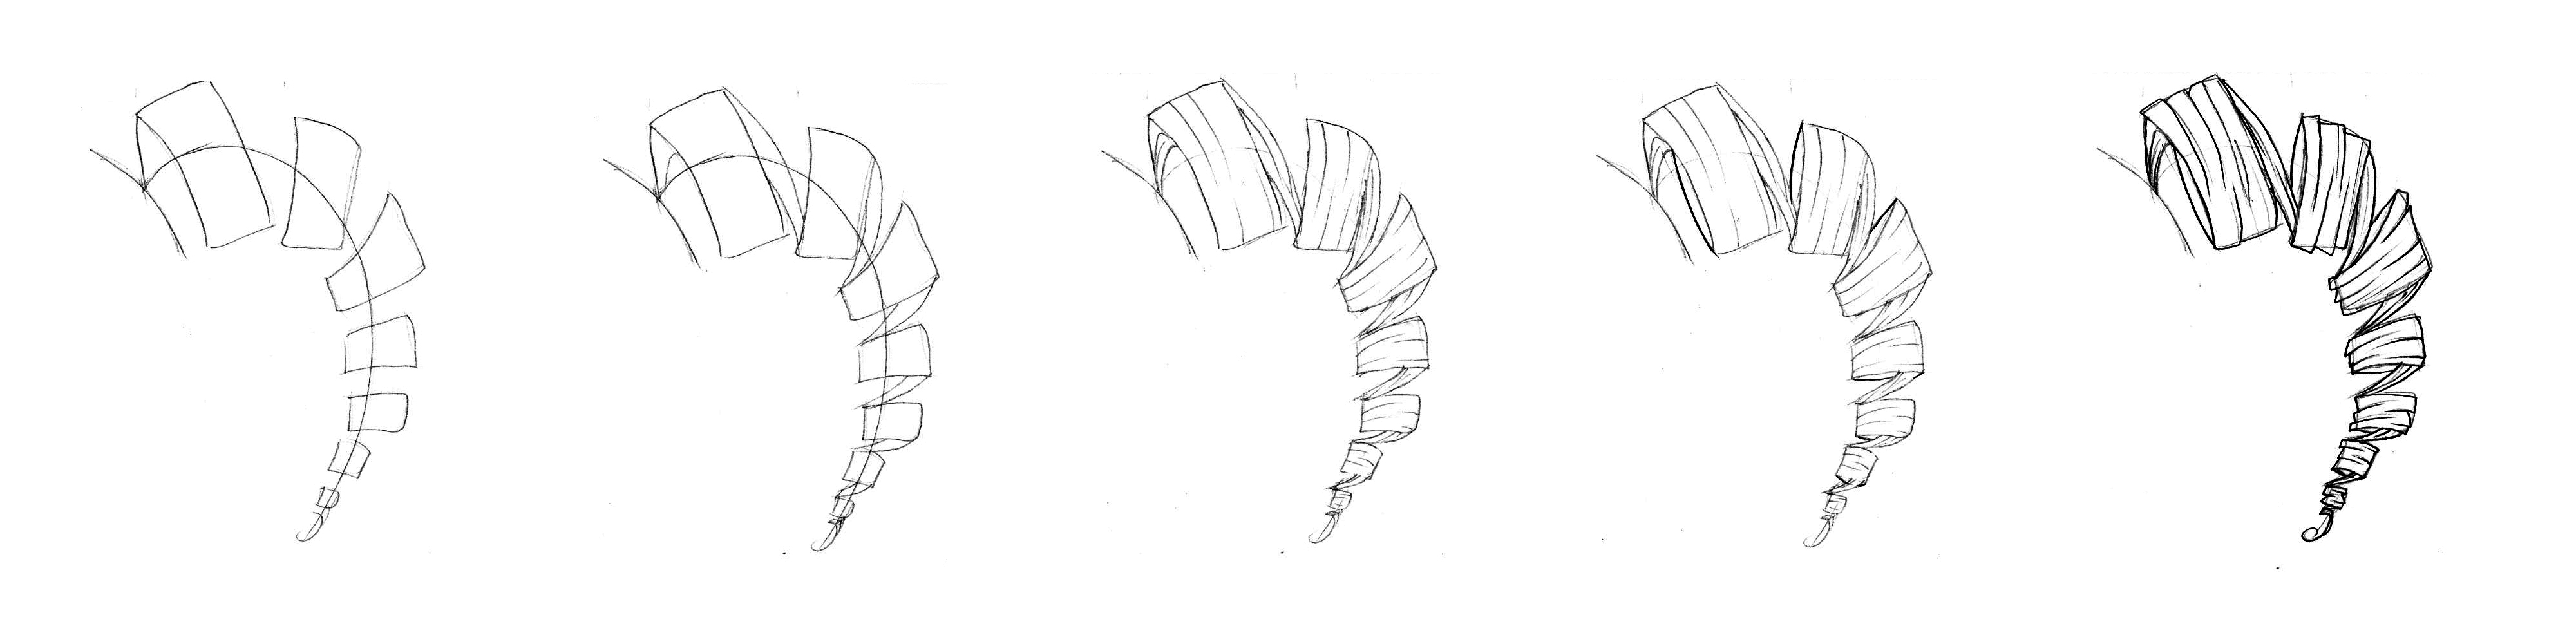
1. Define the direction of the hair. Just trace a line with the direction you want. Draw some curved rectangles in order to define the curls. Attempt the center of these rectangles go through the direction line.
2. Trace the unions between rectangles: from the bottom side of one rectangle to the top of the other. Each union should start wide and end narrow.
3. Details. Just add some lines in the rectangles and the unions. Trace as many lines as you want and procure these lines don't get to the end of the rectangle, as you can see, the lines (mostly) only get to the center of the curl. In the unions feel free to trace the lines as you wish.
4. Oops, I almost forgot! Trace the inner side of the curls, visualize it as a cylindrical figure from a certain angle, you'll realize that you also get to see a little curve at the other side of the cilinder. That's the curve we trace.
5. The final step: More details. As you can see, the borders of the curls are not a perfect curve or straight line, the lines in step 3 overcome a little bit creating a salient. This final step is pretty easy indeed, just retrace your drawing with a darker color.
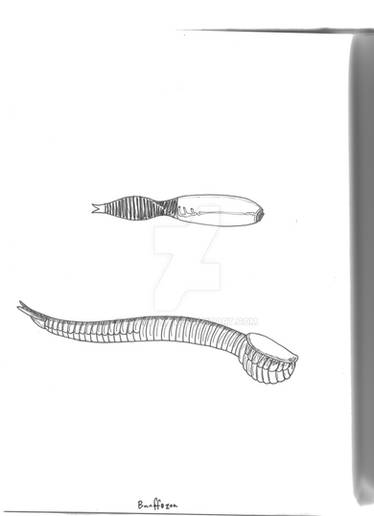
Two applied examples of this tutorial: [link] and [link]
Hope this helps (:
~ * ~ * ~ * ~ * ~ * ~ * ~ * ~ * ~ * ~ * ~ * ~ * ~ * ~ *
ESPAÑOL: Este es un pequeño tutorial para dibujar rizos (:
1. Define la dirección del cabello. Simplemente traza una linea con la dirección que desees. dibuja algunos rectangulos para definir las ondulaciones. Trata de que el centro de estos rectangulos pase por la linea de dirección.
2. Traza las uniones entre cada rectangulo: Desde el lado inferior de un rectangulo hasta la parte superior del otro. Cada unión debe comenzar ancha y terminar angosta.
3. Detalles. Simplemente agrega algunas lineas en los rectangulos y en las uniones. Traza las lineas que quieras y procura que estas lineas no lleguen hasta el otro lado del rectangulo, como puedes ver, la mayoría de la lineas solo llegan al centro del rizo. En las uniones traza estas lineas como desees.
4. Casi se me olvida..., Traza la parte interior de los rizos. Imagina que es un cilindro, cuando el cilindro cambia su angulo, se alcanza a observar una pequeña curva al otro lado, esta es la linea que trazamos.
5. Paso Final: Más detalles. Como puedes observar, los bordes de los rizos no son curvas o lineas rectas perfectas, las lineas de detalles que se trazan en el paso 3 sobresalen un poco creando una saliente. Este paso final es muy sencillo, solo hace falta realizar el trazado final de todo el dibujo haciendo que sobresalgan un poco estas lineas y listo!
Algunos Ejemplos aplicados de este tutorial: [link] y [link]
Espero que estoy sea de ayuda (:
English: this is a little tutorial of how to draw curls for beginners (or not XD, enjoy anyway).
1. Define the direction of the hair. Just trace a line with the direction you want. Draw some curved rectangles in order to define the curls. Attempt the center of these rectangles go through the direction line.
2. Trace the unions between rectangles: from the bottom side of one rectangle to the top of the other. Each union should start wide and end narrow.
3. Details. Just add some lines in the rectangles and the unions. Trace as many lines as you want and procure these lines don't get to the end of the rectangle, as you can see, the lines (mostly) only get to the center of the curl. In the unions feel free to trace the lines as you wish.
4. Oops, I almost forgot! Trace the inner side of the curls, visualize it as a cylindrical figure from a certain angle, you'll realize that you also get to see a little curve at the other side of the cilinder. That's the curve we trace.
5. The final step: More details. As you can see, the borders of the curls are not a perfect curve or straight line, the lines in step 3 overcome a little bit creating a salient. This final step is pretty easy indeed, just retrace your drawing with a darker color.
Two applied examples of this tutorial: [link] and [link]
Hope this helps (:
~ * ~ * ~ * ~ * ~ * ~ * ~ * ~ * ~ * ~ * ~ * ~ * ~ * ~ *
ESPAÑOL: Este es un pequeño tutorial para dibujar rizos (:
1. Define la dirección del cabello. Simplemente traza una linea con la dirección que desees. dibuja algunos rectangulos para definir las ondulaciones. Trata de que el centro de estos rectangulos pase por la linea de dirección.
2. Traza las uniones entre cada rectangulo: Desde el lado inferior de un rectangulo hasta la parte superior del otro. Cada unión debe comenzar ancha y terminar angosta.
3. Detalles. Simplemente agrega algunas lineas en los rectangulos y en las uniones. Traza las lineas que quieras y procura que estas lineas no lleguen hasta el otro lado del rectangulo, como puedes ver, la mayoría de la lineas solo llegan al centro del rizo. En las uniones traza estas lineas como desees.
4. Casi se me olvida..., Traza la parte interior de los rizos. Imagina que es un cilindro, cuando el cilindro cambia su angulo, se alcanza a observar una pequeña curva al otro lado, esta es la linea que trazamos.
5. Paso Final: Más detalles. Como puedes observar, los bordes de los rizos no son curvas o lineas rectas perfectas, las lineas de detalles que se trazan en el paso 3 sobresalen un poco creando una saliente. Este paso final es muy sencillo, solo hace falta realizar el trazado final de todo el dibujo haciendo que sobresalgan un poco estas lineas y listo!
Algunos Ejemplos aplicados de este tutorial: [link] y [link]
Espero que estoy sea de ayuda (:
Image size
4000x1000px 676.15 KB
Date Taken
Apr 14, 2010, 7:53:58 AM
© 2010 - 2024 Scented-Tea
Comments17
Join the community to add your comment. Already a deviant? Log In
thank You! WOW! I just draw my first curl! looks hard, but Your tutorial explains it perfectly! SOOO much tkankies!